The 5th GIS Software Technology Conference has come to an end. Do you remember the AR map case displayed by mobile GIS at the show? It is very cool to overlay 3D objects on realistic scenarios on a mobile phone.
It is a common need in urban management to put features and models into real scenes after collection. How can we quickly collect objects? After building the ground object model, how can we put it into the real scene? This article introduces the whole process of AR data collection, AR scene creation, and mobile terminal loading.
The first step: Collect AR data
Use SuperMap ARSurvey (Hereinafter referred to as ARSurvey) to collect AR data on the mobile phone.
1 New data
On the [Mine] page, enter the [Data] module, create a new data source, and create a series of datasets to store the collected elements. Different elements correspond to different types of data sets, such as trees and stop signs matched with the point data set and roads matched with the line data set.
Note: The data set requires a projected coordinate system or a planar coordinate system, and geographic coordinate systems are not supported.
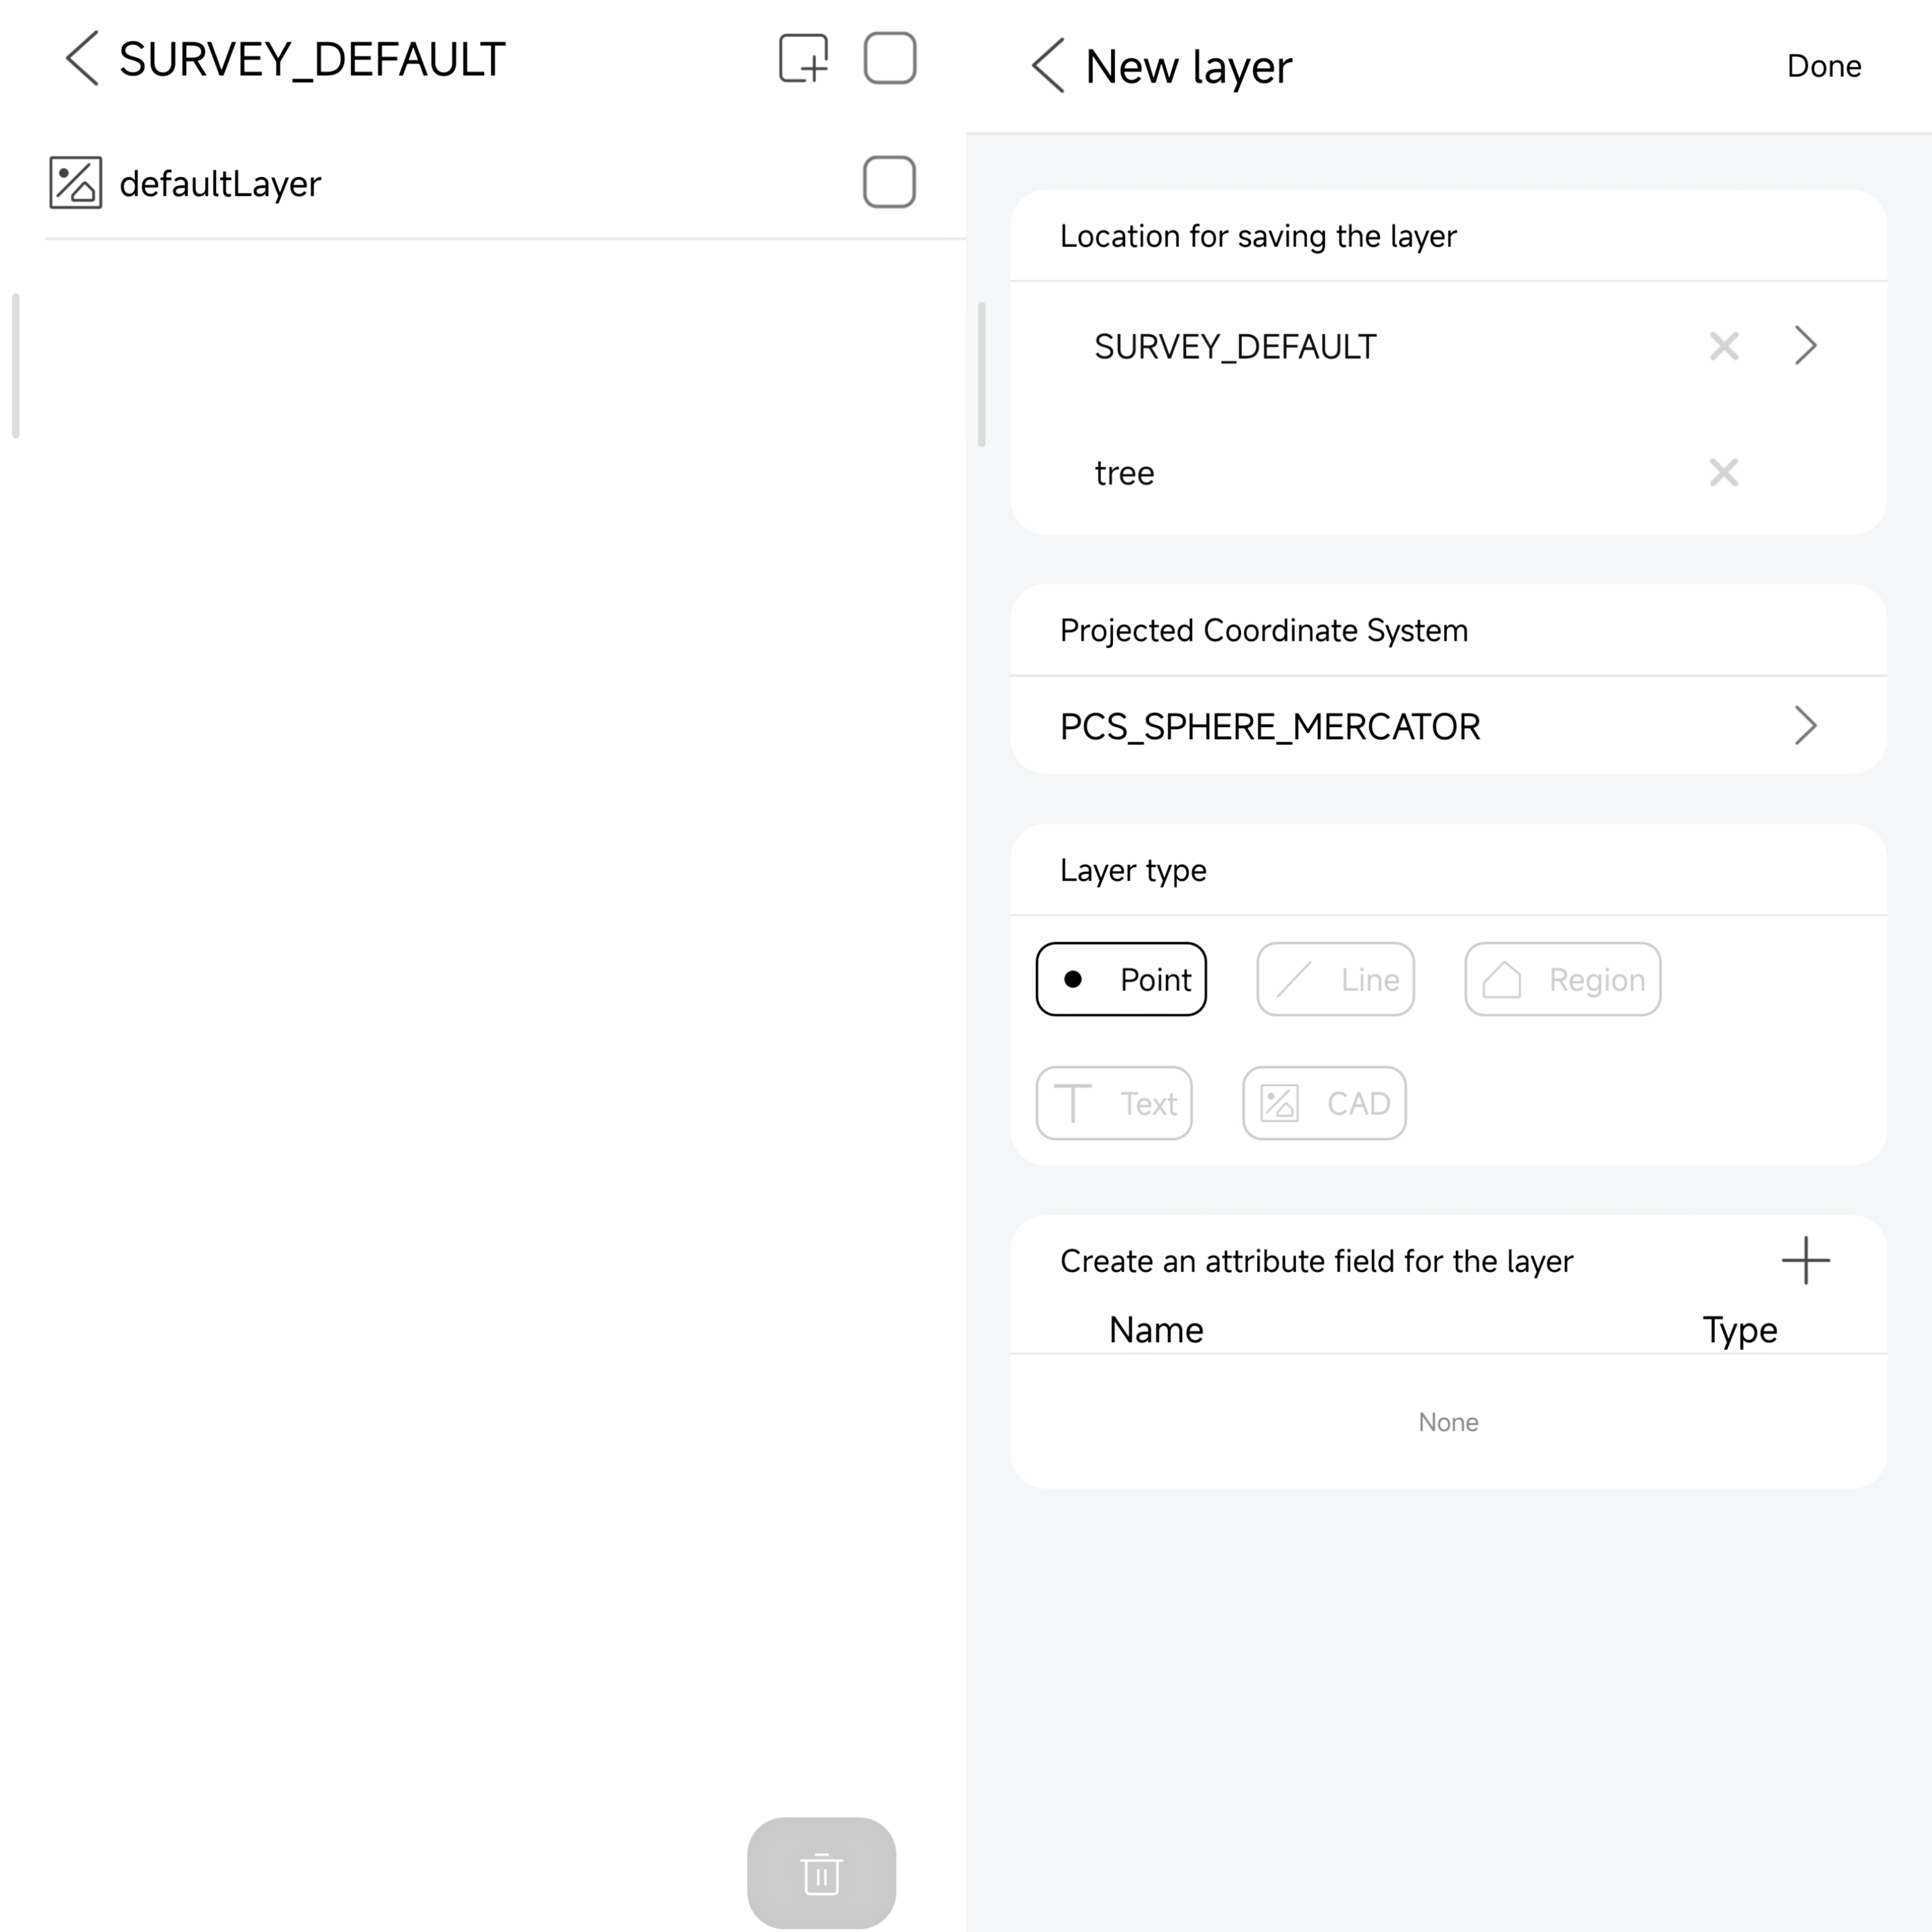
2 To collect
(1) Select the base point
Set the collection base point, preferably a real object, so that you can find the placement position when loading the model later.
(2) Collect elements
After entering the collection interface, you can select the collection type at the upper left of the page, and in the “Settings” button, set the layer to be saved, and then you can classify the collection elements. After collecting one type of feature, you can switch the collection type and save the layer, and then collect another type of feature.

The second step: Create the AR scene
The AR scene is created in SuperMap iDesktopX.
1 Data type conversion
Convert all collected 2D data to 3D data, which is convenient for setting 3D symbols.
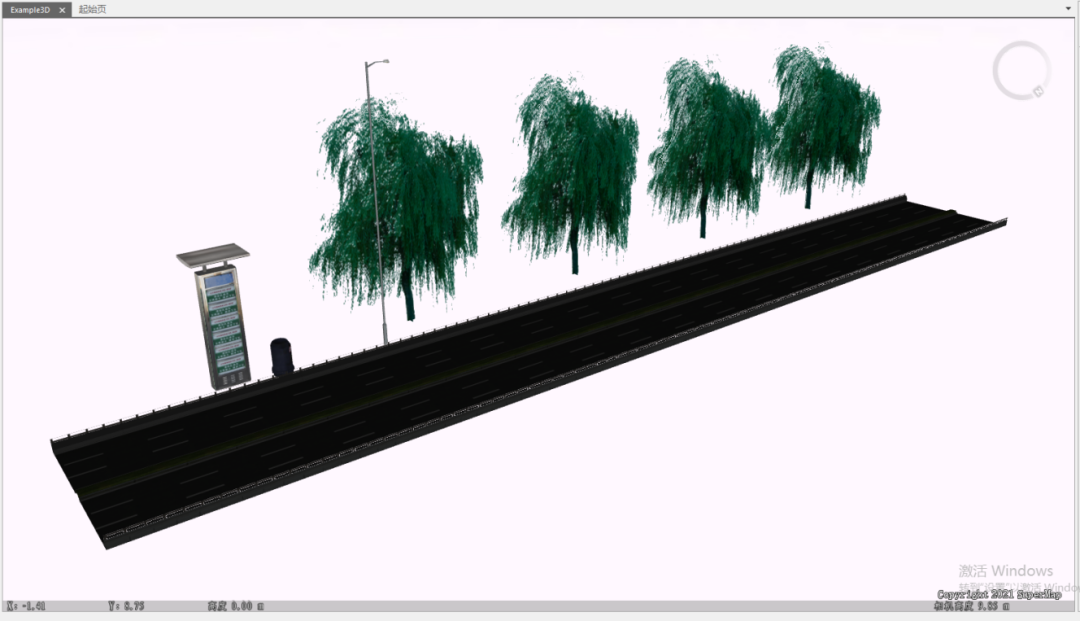
2 Make the scene
Create a new plane scene, add the processed 3D dataset to the plane scene, and set the corresponding style for each feature layer. For example, you can set the stop sign symbol at the stop sign scene, and the tree symbol at the tree scene.
3 Generate scene cache
Generate a scene cache for the scene saved in the production.
The third step: Load the 3D scene
There are two ways to load 3D scenes in ARSurvey — offline loading and online loading.
1 Offline loading
Use the mobile assistant, put the workspace of the scene cache in the “ARSurvey/ExternalData” path, and import the data under the [Import] module on the [My] page. Then in the [AR Drawing] module, select the “3D” button in “Add” .
2 Online loading
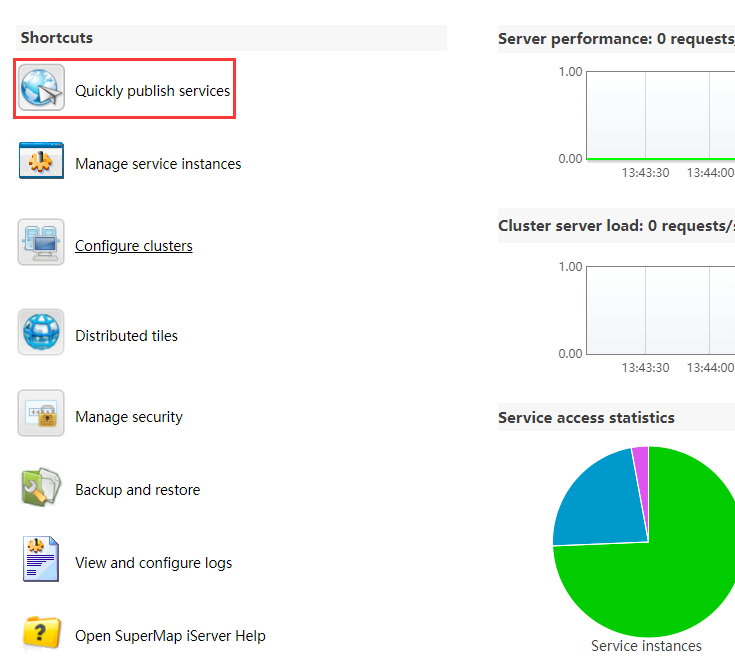
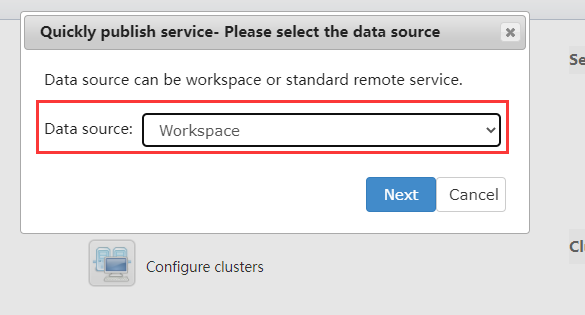
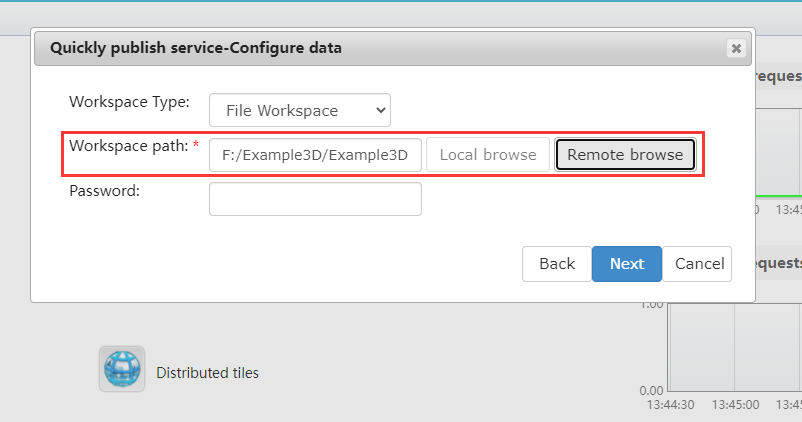
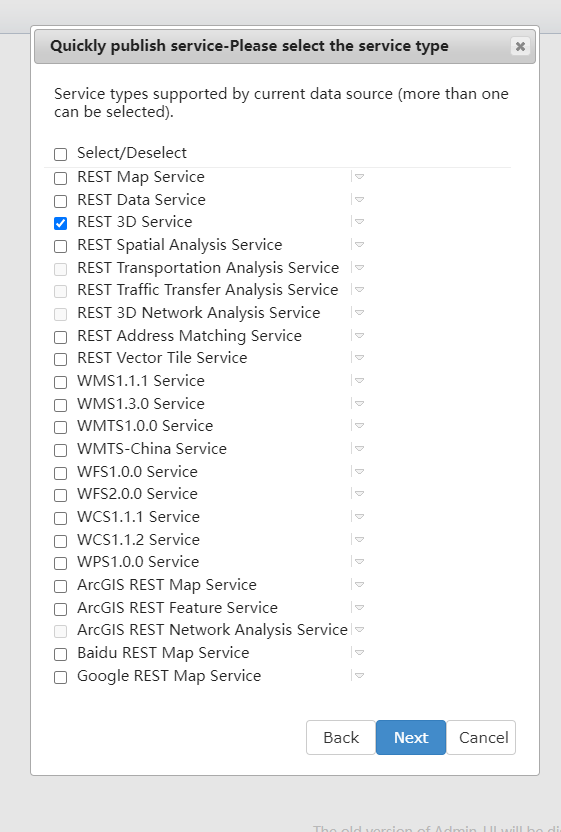
(1) Publish service
Use SuperMap iServer to publish the cache workspace as a REST 3D service, and get the service link after publishing.
(2) Load online data
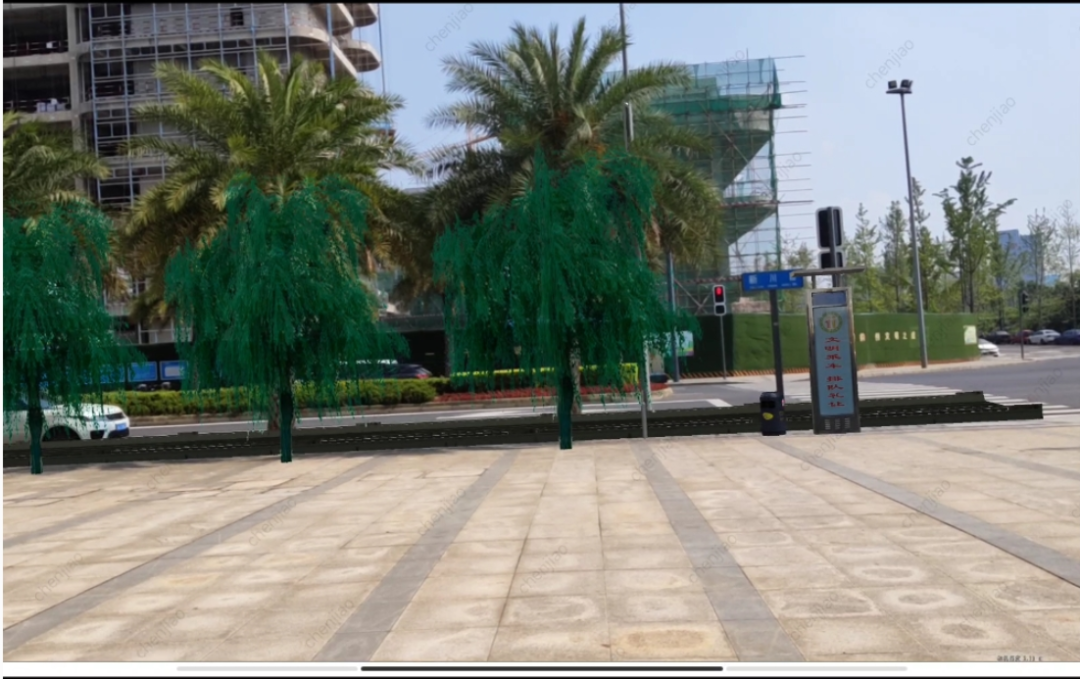
In the [AR Mapping] module, click on the “3D” button in “Add” , select the “Online” method, and enter the service address to load the 3D scene service into ARSurvey online. The loaded data can be placed at any location. If you want to place it at the collection location, you can go to the base point in the real scene to place it. You can also fine-tune the position and size of the AR scene after placement.
Now you have a brand-new mobile AR map after all the above steps. You can place actual objects in the real location for immersive viewing, and can also place all elements in other locations (such as on the desktop), to manage different elements in the overall scene.
SuperMap ARSurvey is an AR-based lightweight app that supports AR measurement, AR mapping, AR navigation, AR analysis, AR mapping, etc. It is mainly used in data collection and production, indoor and outdoor venues AR positioning and navigation, and AR real scene browsing and mapping.
You can download SuperMap ARSurvey from Apple, Huawei, Google, and Xiaomi App stores.